Showing posts with label Paper Pumpkin. Show all posts

Hope is a powerful thing...

Stampin' Up! Paper Pumpkin - Kits in the Mail

Paper Pumpkin - Paper Crafting Kits in the Mail

This month's Paper Pumpkin kit is inspired by Shelli, the Stampin' Up! cofounder and is all about empowering yourself and others. It includes supplies to create nine encouraging cards and coordinating envelopes in an inspiring color palette, and comes packaged in a specially designed Hope Box!

The Hope Box is designed to be a keepsake box—you can keep mementos of cherished memories or reminders of what’s yet to come. Collect treats and trinkets that represent what hope means to you and look inside for inspiration or fill it and share it with a friends who could use some uplifting!

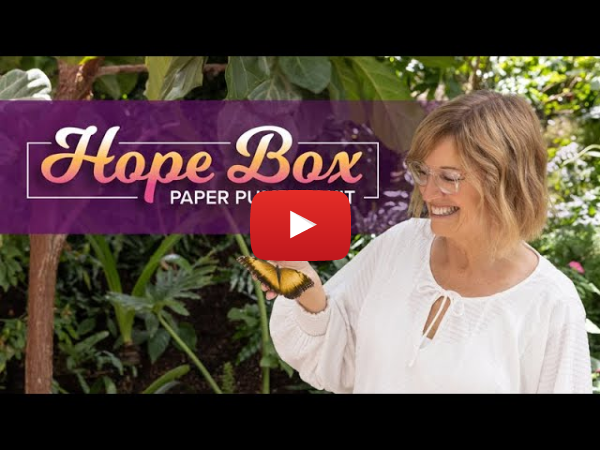
What will you put in your Hope Box? For inspiration and ideas on how to build your Hope Box, watch Shelli herself put one together in this video.

Be sure to subscribe by August 10th so you don't miss out on this extra-special kit!

VIEW SUBSCRIPTION OPTIONS


--Marion Dornan

Everyone needs a break from the stresses of life.
My classes offer an escape from the world with a little crafty outlet.
You will leave refreshed, with a beautiful project you have made
Stampin' Up! Demonstrator

----------------------------------------------------------------------------------

You’ll Love Your Monthly Crafting Experience
We know you’ll find something to love about crafting with Paper Pumpkin. You no longer have to wonder about what to make or how to make it. We have everything prepared for you. And every kit is guaranteed. So don’t worry! If you experience any problems with your monthly crafting subscription just contact me.

Design
Card size: 4-1/4 x 5-1/2

Project Type
Kit contains supplies to create nine cards and coordinating envelopes and comes in a special box!

Coordinating Colors
Bermuda Bay, Blackberry Bliss, Bumblebee, Melon Mambo, Petal Pink, Pool Party, Poppy Parade

DOWNLOAD FLYER


Stampin' Up! Paper Pumpkin - Kits in the Mail


Sneak a Peek at this Paper Pumpkin Kit
Paper Pumpkin

WATCH VIDEO


VIEW SUBSCRIPTION OPTIONS

Subscribe to Paper Pumpkin before August 10th.

...January Ladies Class Projects


Diamond Box by Jessica Winter Artisan Design Team 2015-2016 Member Ladies Class Project MarionCreates.comThis wonderful box was on the Stampin' Up! blog and created by Jessica Winter, Artisan Design Team 2015-2016 member. It is so unique and easy I knew we had to make it in the January Ladies Classes. The instructions, with pictures, for this box are below. You will be using the Gift Bag Punch Board for this project.
January Paper Pumpkin Valentine Treat Pouch Ladies Class Project www.MarionCreates.com
The second project are these Sweet Valentine Pouches made from the January Paper Pumpkin Kit. There are about 5 colors to choose from, I chose Tip Top Taupe. They are so quick & easy.
Supplies Needed:
  • Gift Bag Punch Board
  • 8.5"x3.25" Cardstock for the Bottom 
    • Score the long edge at 3/4"
  • 3-9/16"x3-9/16" Designer Series Paper for the Top
    • You will score this piece at 3/4" all the way around as shown in the picture
  • Tear & Tape
    • Bow Builder Punch, Sweetheart Punch, Itty Bitty Punch Pack
    • Embellishments as Desired
    All score lines have been marked with a marker for the purpose of this tutorial, so the lines can be seen easier. You will only score, don't use a marker for your box.

    First you want to insert you 8.5"x3.25" piece of cardstock all the way into the Gift Bag Punch Board, making sure the left edge is aligned with the start line, punch, then score your "Martini Glass" and the top horizontal line. You will have to scoot your cardstock to the right to make the horizontal line go all the way to the left edge of your cardstock. With a pencil make a small tick mark at the lower edge of the cardstock on the "S" line.


    Diamond Box by Jessica Winter Artisan Design Team 2015-2016 Member Ladies Class Project MarionCreates.comDiamond Box by Jessica Winter Artisan Design Team 2015-2016 Member Ladies Class Project MarionCreates.com

    Move your cardstock to the left, lining up the little tick mark with the start line. Repeat the step above, only this time you won't need to move your cardstock to the right to complete the horizontal line, just score the horizontal line along with making your "Martini Glass".

    When you get done, your box bottom will be score and punched as show in the second picture below. The horizontal line at the bottom of the "Martini Glasses" is 3/4", score that using a paper trimmer fitted with a scoring blade or the Simply Scored Plate.

    Diamond Box by Jessica Winter Artisan Design Team 2015-2016 Member Ladies Class Project MarionCreates.com
    Diamond Box by Jessica Winter Artisan Design Team 2015-2016 Member Ladies Class Project MarionCreates.com
    The "flaps" at the top of the cardstock strip are actually the box bottom flaps. To score you will fold your flaps with a "mountain" fold, the 3/4" top as a "valley" fold. The "Martini Glass" will be a "mountain" fold, gently fold the diagonal lines and the "stem" of the "Martini Glass" will just follow.  Your instinct will be to fold the last 1/4" flap that holds the box together, don't. if you do than your fourth side will not be a flat fourth size but rather a weird 4th & 5th side and your lid won't fit properly. Ask me how I know.
    Either before or after folding on all the lines, cut a couple of notches on the last 1/4", you can also add Tear & Tape.
    Diamond Box by Jessica Winter Artisan Design Team 2015-2016 Member Ladies Class Project MarionCreates.comDiamond Box by Jessica Winter Artisan Design Team 2015-2016 Member Ladies Class Project MarionCreates.com
    Remove the protective paper from the Tear & Tape and adhere the tab on the inside of the box, lining up the points and creating a new "Martini Glass".
    Diamond Box by Jessica Winter Artisan Design Team 2015-2016 Member Ladies Class Project MarionCreates.com
    To put assemble the lid, score all four sides at 3/4" either with a Paper Trimmer fitted with a scoring blade or with the Simply Scored Plate. Cut notches on each of the four "squares" created from scoring. Fold on all the score lines and adhere the corners on the Inside of the rectangles, as to hide the tabs.
    Diamond Box by Jessica Winter Artisan Design Team 2015-2016 Member Ladies Class Project MarionCreates.com


    Diamond Box by Jessica Winter Artisan Design Team 2015-2016 Member Ladies Class Project MarionCreates.com
    I hope that was helpful. Comment below if you have an questions.


    July Paper Pumpkin


    I have been so busy the last few months that when my wonderful box of goodies, Paper Pumpkin, comes I barely get to open it to look inside, let alone break the seal on the wonderful goodies and create the goodies inside.

    Well, not this month! Ok, it did sit for a few days but I did finally give it the love it deserves and oh it felt so good. I have to say that until a few days ago, I had lost my mojo, my creative spark, my desire to create anything. Even typing up the few blog posts I have done this week would have seemed insurmountable just a week ago.

    I've been paying attention to what others have doing and I decided to give it a try.


    Here are my creative changes to the kit.......


    First, I broke out the brayer. I had seen someone else do it on another Paper Pumpkin kit a few months ago and decided I wanted to try it this month. And I love how it turned out.

    The "thanks a latte" was stamped in the Watermelon Wonder ink but because it didn't stand out very well, I used the Project Life Journaling Pen to outline the words. I love how it turned out! And because you should never have naked envelopes I stamped it to match. So, don't be afraid to do something different, you don't have to settle for their ideas. Want to get your own Paper Pumpkin kits delivered to your door? Go to www.MyPaperPumpkin.com and sign up today!

    And the best part, all new Paper Pumpkin subscribers that sign up by September 10, 2015 will receive their first two months at 50% off!


    Hey July, Don't Be Afraid

    Hey July, Don't be Afraid to try something new....

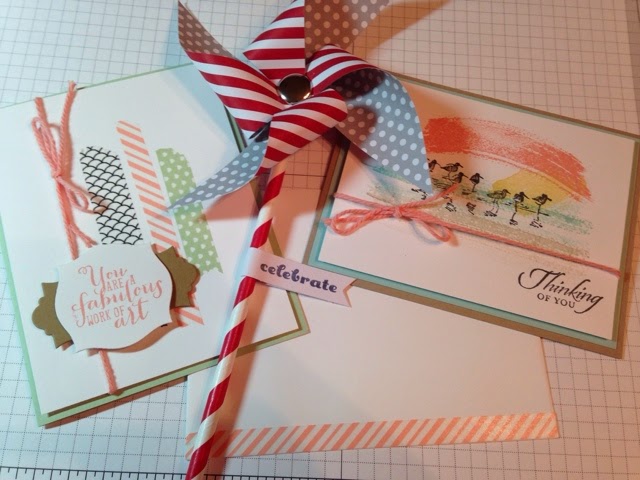
    These are the projects we made during July's Ladies Classes. The card on the right is so simple yet so wonderful! I love the colors are so sweet and subtle. We even created a matching envelope by putting the Crisp Cantalope stripped Washi Tape at the bottom of the envelope.

    The Pinwheel is from June's Paper Pumpkin Kit. The directions say to attach the completed pinwheel to the paper straw but we poked a hole in the straw and fed the brad prongs through, so it can turn. Thank you Robin for that tip!

    The card on the left is using the Wetlands and Work of Art stamp sets. I didn't used to like Wetlands but since I have seen so many wonderful beach scene cards made with that set I had to have it. Don't you just love how the Work of Art set can make the project look like it was watercolored? I have problems doing random stamping, and I know a few of you do too, so that is why I love this set. I have the control I want, yes I do have control issues, but makes it look like I was free with my "brush strokes".

    If you would like a list of the items we used to make these cards please contact me, I would be happy to send them to you.


    I Went Rogue


    This is July's Paper Pumpkin kit. Isn't is so cute? There are gift boxes and the elements to make cards.

    If you know anything about me, you know that I can't leave well enough alone. Yes, there are instructions on how to put these lovely cards together, but.....


    I was trying to match the colors in this sweet Dressed Up Framed Art. It's a birthday gift for a lovely friend of mine.


    So the first thing I did was cut off a row of the letters that spell Wish. Then I took a sponge and Elegant Eggplant ink to change the color to match closer to the gift.

    I didn't want to struggle with trying to get the letters out off the backing so instead of removing the letters, I removed the piece of adhesive card stock around the letters.


    As you might notice, the card in this fourth picture is missing a couple of stamped areas. I didn't like the way it was going so I started over on the back side and decided to use it as a layer.

    I also wheeled the background with a retired stamp, and the candles are also from a retired set. I just wanted the candles so I used my Melon Mambo Stampin' Write Markers to ink the candles and stamp them on the card. I then added the cupcake punched pieces from the Cupcake Builder Punch. I also added rhinestones to the "frosting", which I colored with the Rich Razzleberry Blendabilites.

    Did you notice the Happy Birthday. See how it is curvy? That is one of the many wonderful things about the Photopolymer Stamps. They're flexible. So if you don't want to have a straight line and it's long enough to "bend", you can!


    Here they are! The sweet gift for my friend, and the matching Birthday Card.


       And speaking of Birthday Cards, there is a little boy named Danny who has brain cancer. All her wanted for his birthday were cards with his name on them. Not that having his name on them wasn't special, but because he knows how to read his name. So I pulled a card out of my stash, probably one I received as a swap at some point, addressed it and sent it to him. Inside the card I wrote his name and wished him a very happy birthday!

    If you would like to send him a birthday card, visit my Facebook page to read more about him and get the address to send him a card.


    50% off 2 Months of Paper Pumpkin

    If you haven't tried Paper Pumpkin, now is a great time to sign up--get 50% off your first 2 months. With a deal like this, you'll want to invite everyone you know to give it a try too!

    Offer Dates: July 16, 2014--September 10, 2014
    Offer Details: Use the code HALFOFF2 to join Paper Pumpkin before September 10, 2014, and get 50% off the first two months! After that, keep the creativity coming for only $19.95 + tax per month (shipping included).

    The Fine Print:


  • For new subscribers only.


  • Available for month-to-month subscriptions, not prepaid subscriptions.


  • Discount applied to one kit per month for the first two months of a new subscription. After the first two months, the price for each month's kit will go to the regular price: $19.95.


  • You need to visit MyPaperPumpkin.com to join.


  • Enter the Promo Code, "HALFOFF2" when you sign up. 


  • New subscribers must join by Wednesday, September 10, 2014; 11:50 PM (MT).


  • So, if you have been on the fence about joining Paper Pumpkin, now might be the time to try it. 2 months for the price of 1 - not a bad deal.

    What is a girl to do....


    What is a girl to do when she's running low on inspiration and needs a card quick?


    I know! Paper pumpkin!

    This month's kit was about Father's Day & Birthdays, but I need a graduation card.


    I pulled out my stamp set Perfectly Penned that has been retired. If you like this stamp set you can still get it as a My Digital Studio Download 130167 for $1.95.


    In Paper Pumpkin's early days I was disappointed in what it had to offer, but in the last few months Stampin' Up! Has stepped it up and now I'm happier than hog in a mud pit. Okay, maybe not because I don't like mud, but you get the idea.

    And what is even more exciting is you can purchase a pre-paid Paper Pumpkin Subscription.

    1 Month Subscription (137858) $19.95
    3 Month Subscription (137859) $59.85
    6 Month Subscription (137860) $113.70 You save $12 over the monthly price
    12 Month Subscription (137861 $215.40 You save $24 over the monthly price

    The above prices are plus tax, shipping is already included in the price. How awesome is that! So if you're not one that likes having your card charged every month, or you would like to give a subscription to someone as a gift, this is a great option!

    http://www.stampinup.com/ECWeb/ItemList.aspx?categoryid=1444&dbwsdemoid=95651Here's something to make it even nicer, if you order a 3, 6 or 12 month subscription during the month of June (2014) I will give you a free bottle of Tombow Mono Multi.  This will come in very handy to put together your paper pumpkin kits.

    How does the Pre-Paid Paper Pumpkin Subscription work? Here's how....

    1. When you place your order, you will receive an e-mail with instructions on how to redeem the prepaid subscription.
    2. Then go to www.mypaperpumpkin.com and enter the redemption code.
    3. You will start enjoying your monthly Paper Pumpkin project kit the very next month!
    The Fine Print
    • Prepaid subscriptions can be made on all order types: workshop, or online.
    • Each Paper Pumpkin account can only use one redemption code at a time. For example, if you buy two six-month prepaid subscriptions,you will enter the first code and then after six months can enter the second code. 
    • To give a prepaid subscription as a gift. You would just purchase the prepaid subscription and when you receive the redemption code, share it with the recipient of your choice who can redeem the subscription at www.mypaperpumpkin.com.
    • Redemption codes will become invalid if not used within three years of the purchase date (two years for residents of California).  
    FAQ's
    Q: Can a current subscriber order a prepaid subscription?
    A: Of course! After they order and enter the code, the prepaid months will be used up before any future shipments are charged. When the prepaid months are over, the subscription will continue and be charged monthly to the credit card on file. Keep in mind that if a current subscriber is already attached to a demonstrator, the existing subscription will remain with the original demonstrator.
     Q: Can I buy a prepaid subscription with hostess benefits?
    A: Yes. A prepaid subscription can be added to either the free or half-priced hostess items.


    If you have any questions, contact me anytime, and I will do my best to answer them.

    Thanks for stopping by!

    Paper Pumpkin Promotion


    Offer Ends: August 31, 2013

    Offer Details: Use the promotion code PUMPKINDEAL to join Paper Pumpkin before August 31, 2013, and pay only $10 a month* for the first two months.
    *plus tax, where applicable. Shipping included!

    The Fine Print:
    • For new subscribers only.
    • Promotion applies only to the first two months of a new subscription. After receiving two month's worth, the price for each month's kit will go to the regular price: $19.95.
    • You need to visit mypaperpumpkin.com to join.
    • You must click "Add Promo Code" and then enter the promo code PUMPKINDEAL in the "Promo Code" field when you sign up on the mypaperpumpkin.com website to take advantage of this promotion. 
    • Be sure to select me as your demonstrator
    • You must join by Saturday, August 31, 2013; 11:50 PM (MT).

    Questions? We Have Answers . . . 

    Q: If the offer is only for new customers, can't I just cancel my existing membership and re-sign up using the special code?
    A: No. When you cancel and try to re-sign up with the same e-mail address, the system will recognize you and reinstate your former membership. The promo code will not work.

    Q: Can I just cancel and re-sign up using a different e-mail address and use the promo code?
    A: Yes, this option will work, but keep in mind you will receive the Welcome Kit on your first month. That means you will miss the actual kit of that month and you will really only get one new discounted kit in the end.


    Q: How do I redeem the special offer?
    A: Visit mypaperpumpkin.com, click on "Join Now" and enter all of your information. Make sure you select "1" as the quantity for kits and enter the coupon code PUMPKINDEAL in the promo code box which is located just below the kit quantity. You will then finish with payment information and click "Submit." You will receive a confirmation and a request to set up a password. You can return and do that at any time.

    Q: What if I sign up to get more than one kit per month?
    A: That's great-more fun for you. However, the two-month discount will only apply to one kit each month.